Getting a flat tire on an Electric Unicycle can a pain to replace, depending on the model of Wheel you own, it can can take upwards of an hour-and-a-half. In our experience, over 95% of case of flat tires that we’ve seen are the direct result of not having sufficient pressure in the tire, causing premature wear when the innertube rubs against the inside of tire. To reduce the chances of getting a flat, it’s advisable to periodically check the pressure & inflate it appropriately for your weight, for more information on this topic, please refer to this blog post https://www.ewheels.com/guide-tires-appropriate-pressures-electric-unicycle/
This short step-by-step guide will try to help you get on the road with the minimal amount of downtime; although it applies to the King song 14D/14S, the same principles may be applicable for other models as well:
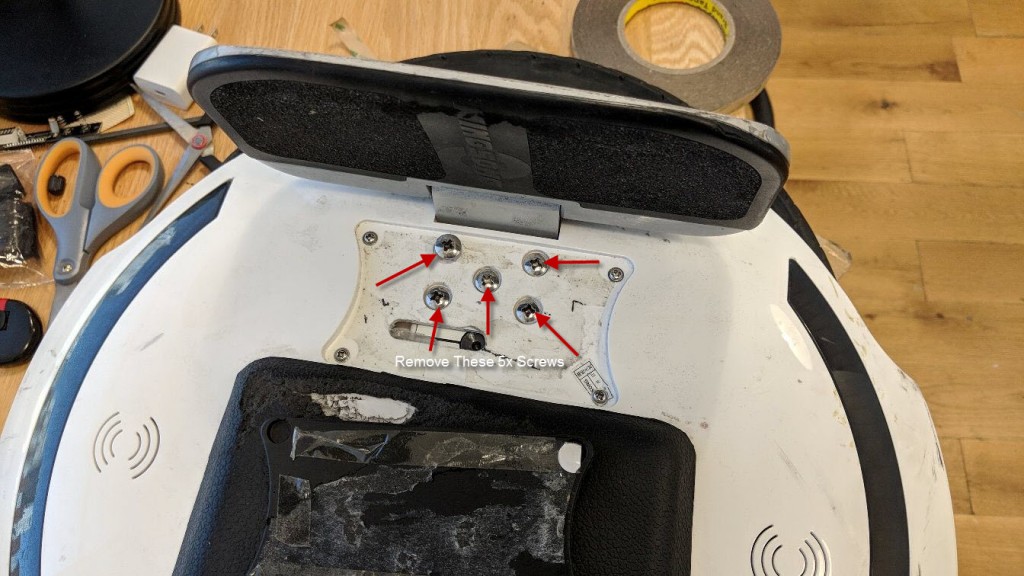
Step 1: Removing Motor Screws from Right Side
Rather than taking the Wheel completely apart, it’s much easier to simply remove the five large screws (on the right side) that secure the motor to the shell, which are revealed by removing the lower pad, held in place with a double-sided adhesive—the right-side is relative to power button positioned in on the front-right.
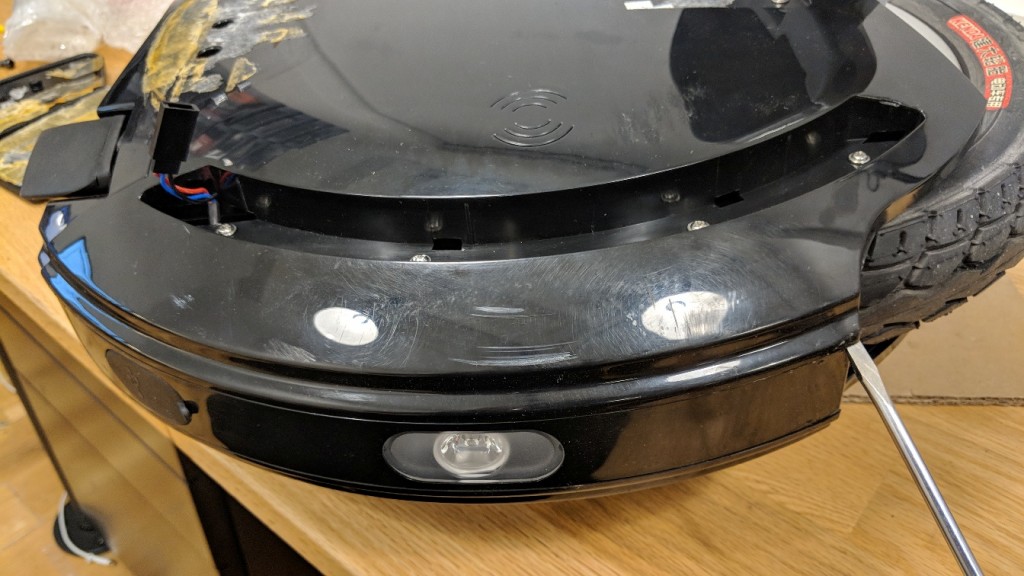
Step 2: Taking the Left Panel Off
The other side is somewhat more time consuming. The first step here is to use a flat-head screwdriver to pry/unclip the LED strip from it’s encasement & remove the four screws on either side. Next remove the lower pad, similar to the left side, you’ll then remove the five motor screws, along with the four other screws on either side of these. Pull away the upper pad & unscrew the remaining top four screws—these screws are slight longer than than the others, so keep separately for reassembly.

You’ll then use the flat-head screwdriver & slide it from the lower-left to right side, which will unclip the outer panel to the innershell.
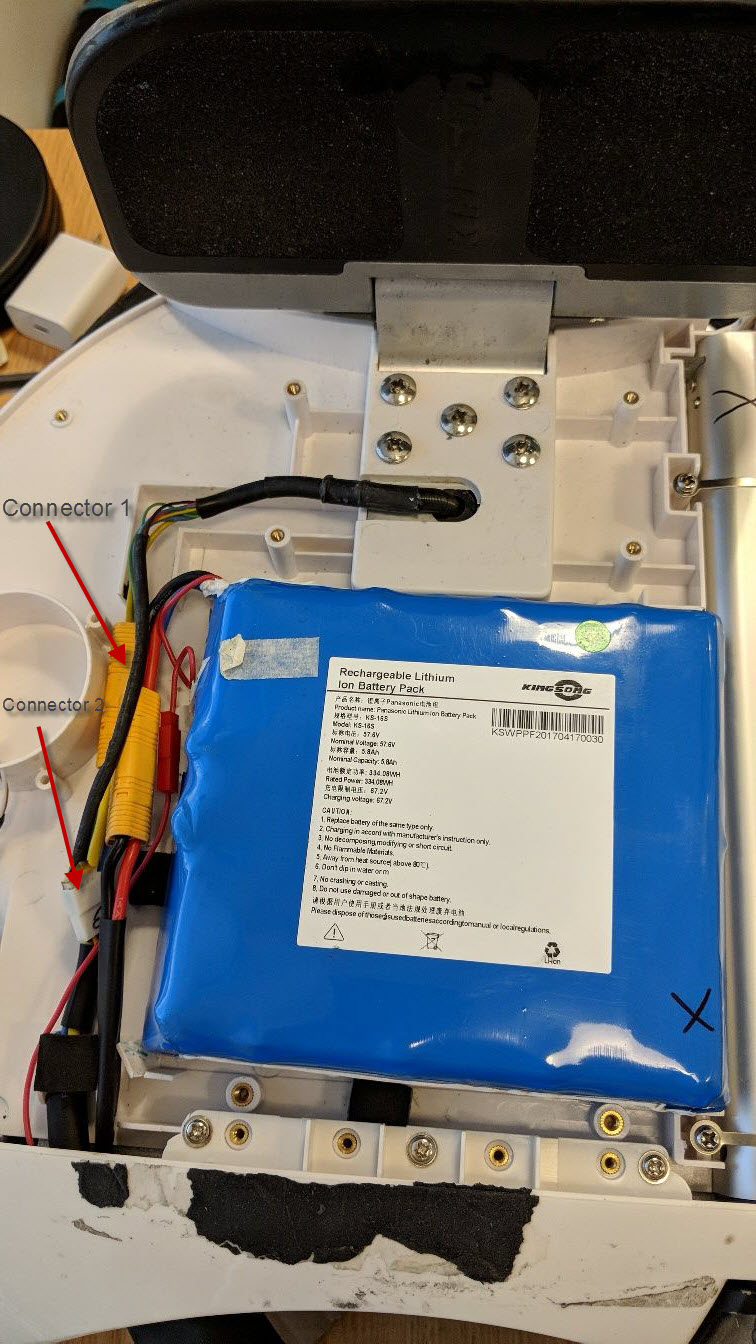
Step 3: Removing the Motor
Now that outer panel has been removed, disconnect the Motor power cable connect & the adjoining smaller one with the five fine wires.
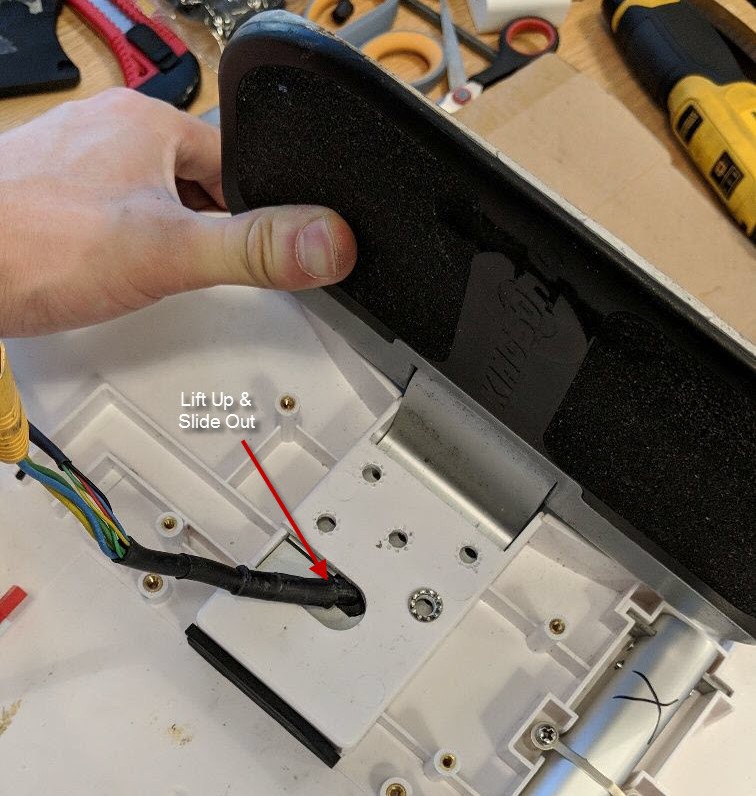
Lift the inner-shell & pull the motor out away from you; please be careful during the removal not to shred or fray these delicate wires.
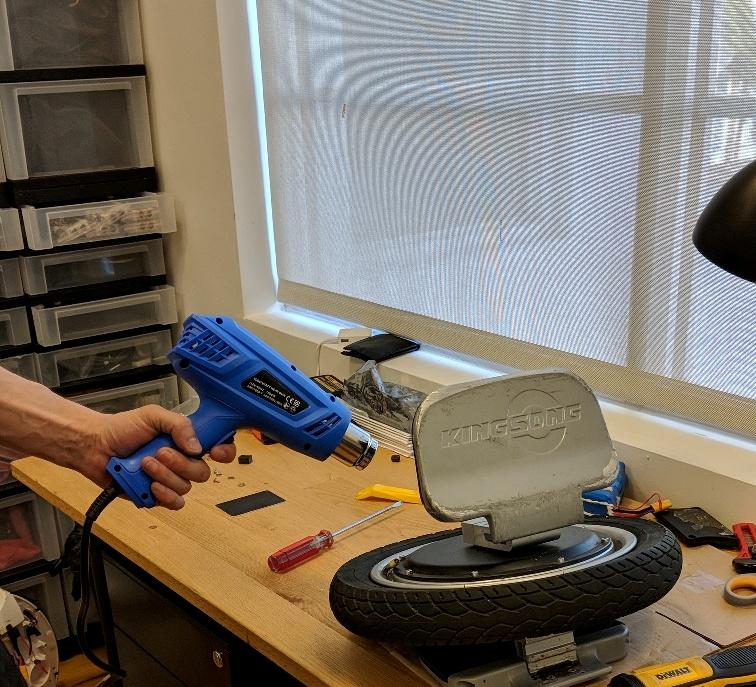
Step 4: Apply heat to the tire
It can extremely arduous to remove the tire from the rim; to help the process, use either a heat-gun or hairdryer (if you don’t have the former) to increase the temperature of the rubber—warm to the touch, but don’t overdo it— which will make the tire compound a lot more malleable & easier to work with.
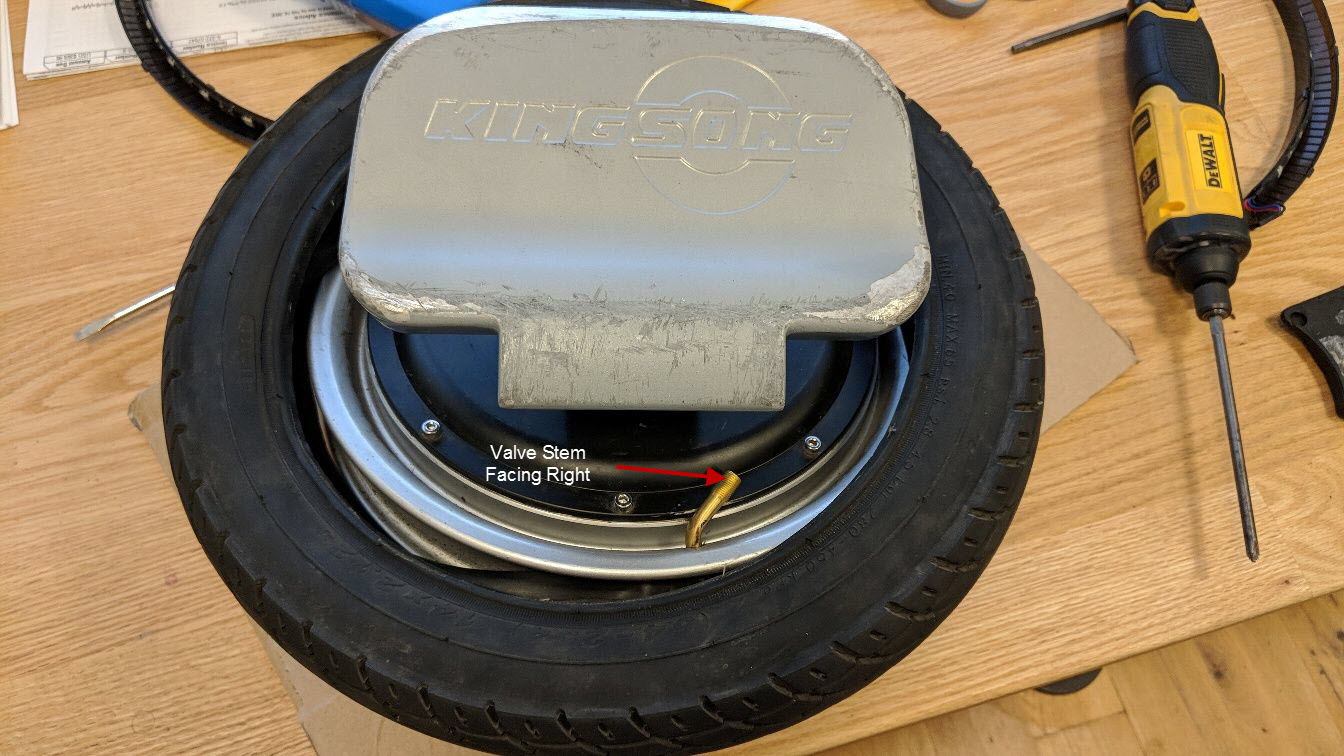
Step 5: Install the Innertube with the 90° Valve Stem Facing Right
The orientation of the valve stem is important; if it’s installed on the left-facing direction, there will not be enough clearance between the shell & the valve, which will result in a knocking or scrapping whenever the wheel is rotated.
Step 6: Reassemble the Wheel
Should you have difficulty refitting the tire, use the same tire preheating technique. It’s recommended to inflate the tire before reinstalling, so that you can see if there’s any irregularities in the form. When reinstalling the motor, run the wires through the slots in the shell first, then rescrew everything back into place. With a powertool, such as the gyroscopic DeWalt screwdriver, the whole operation can be completed in about 20 minutes.